That title is supposed to be some kind of Autobot reference. But it was also the question I was busy asking myself on the Wednesday before Bo'ness weekend.
Last year I had a slightly naive exchange with the senior scrutineer, Rob, asking him if I should not have a fireproof bulkhead separating the passenger compartment from the boot? The answer was pretty obvious if I tell you that the little foam-filled petrol tank lives in the boot, and that I'm normally in the seat in the front. Additionally, my car has a rudimentary through-flow ventilation system that attempts to flow air from the passenger compartment into the boot, and then into low-pressure areas ahead of the rear-window through side vents.
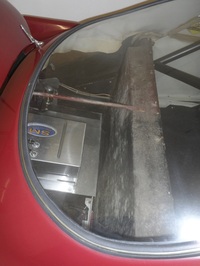
And it was all beyond doubt after removing a couple of self-tappers and pulling out the upholstered, plywood parcel shelf. Of course, I had done nothing about it since the previous year and now had three days to fix it and before facing Rob again.
Last year I had a slightly naive exchange with the senior scrutineer, Rob, asking him if I should not have a fireproof bulkhead separating the passenger compartment from the boot? The answer was pretty obvious if I tell you that the little foam-filled petrol tank lives in the boot, and that I'm normally in the seat in the front. Additionally, my car has a rudimentary through-flow ventilation system that attempts to flow air from the passenger compartment into the boot, and then into low-pressure areas ahead of the rear-window through side vents.
And it was all beyond doubt after removing a couple of self-tappers and pulling out the upholstered, plywood parcel shelf. Of course, I had done nothing about it since the previous year and now had three days to fix it and before facing Rob again.
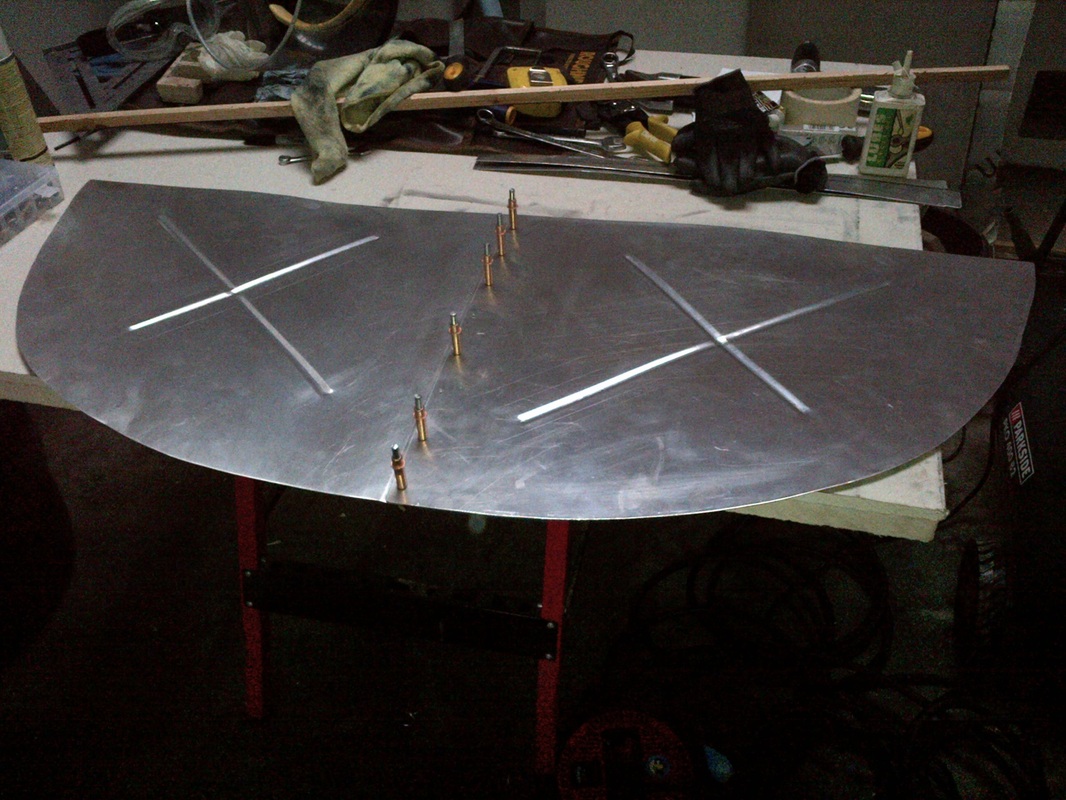
In fairness, I knew it had to be done, and had accumulated key supplies in the man-cave. This included a couple of sheets of aluminium for some different jobs that I had brought back from Glasgow on the roof of the tintop - a 3000ish tempered alloy for the metallurgists out there. And two things for the toolkit I regard as essential.....
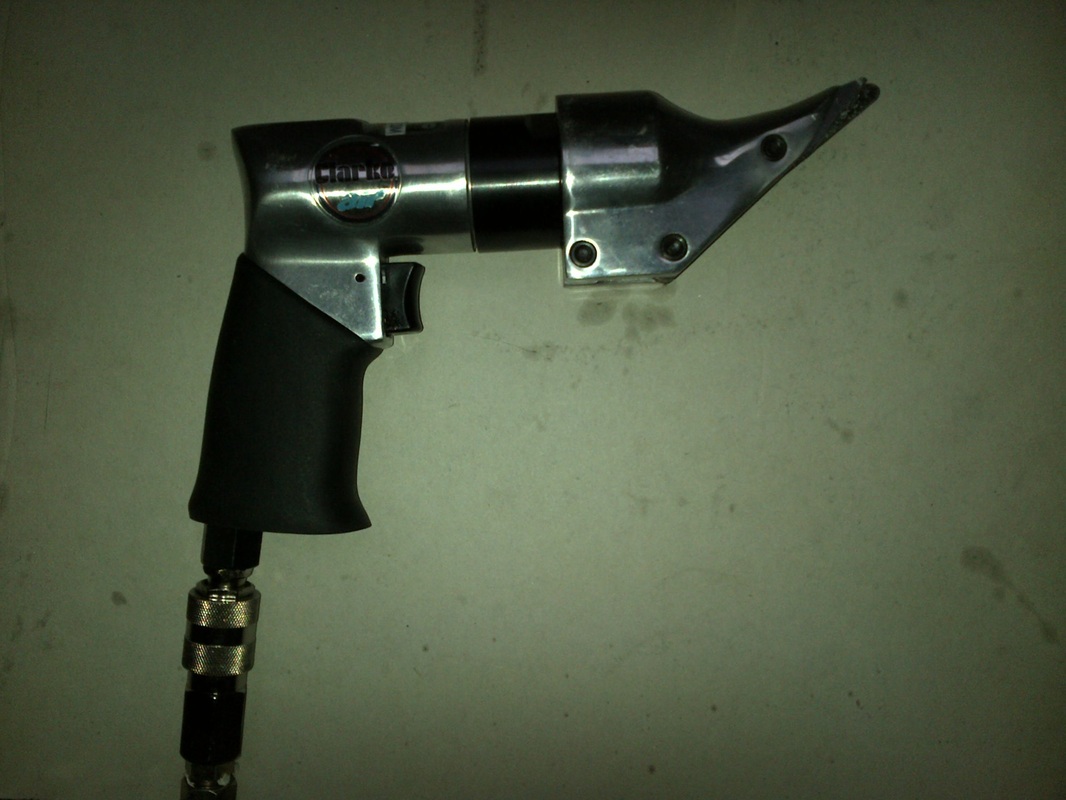
I have a little compressor from Lidl that is adequate to power these pneumatic shears. I had not used them before but pretty quickly found I could trim the odd mm or two from an existing edge using just one face of the nibbling shear, as well as slicing through the sheet. Another good idea is to have TWO different colours of permanent marker, so that when you are adjusting a line you can tell which are the new marks.
The job was complicated by the diagonal of the rollcage. But those years of yoga class, and the decision to make it in two parts, definitely paid off. It also helped that I started with card templates cut from an artist's mounting board rather than trying to use cereal boxes or the metal itself.
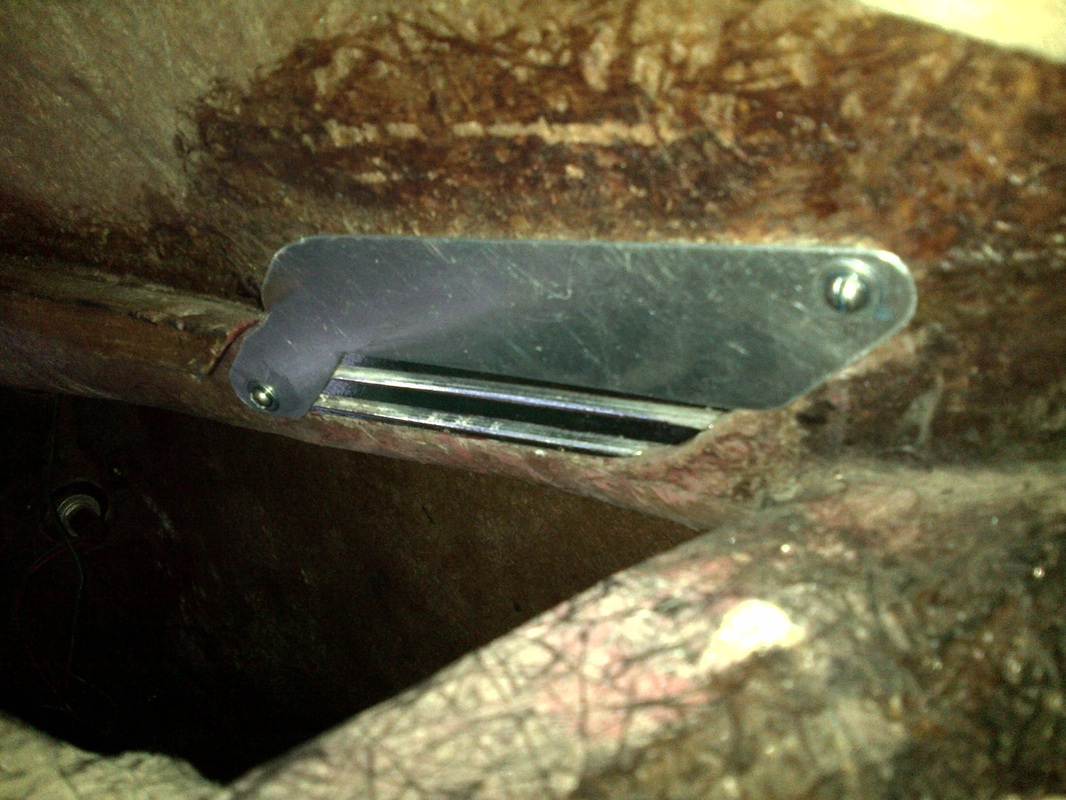
Fortunately Gilbern had bonded in a lip underneath the back window that the parcelshelf rests on, and the seat-back panelling has a square roll over the chassis tubes that becomes the back of the boot. A strut is riveted onto the seat back and to the lip under the rear window to provide some rigidity. So I had good surfaces on which to mount the bulkhead, but they were a little ripply and I had to avoid putting the join of the bulkhead above the tubular tie.
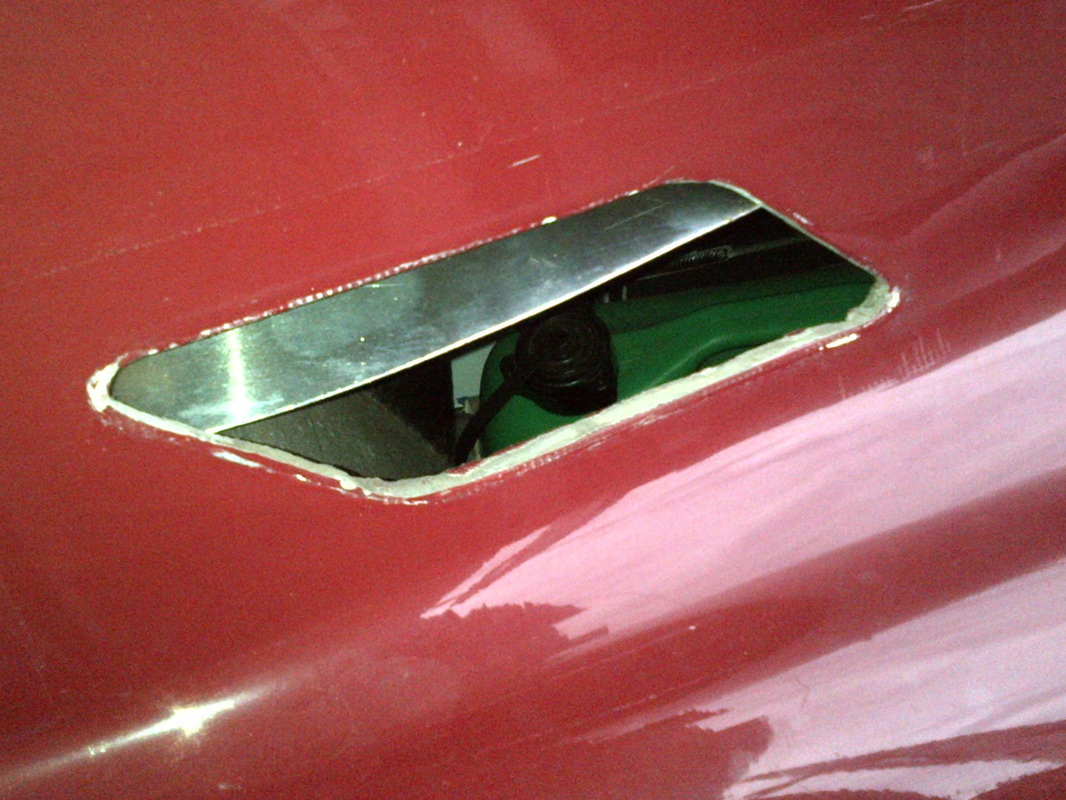
After trial fitting, I found another complication was that the bulkhead bisected the 'airflow' vents unique to this car. I intended to keep them but decided to blank off the upper portion so they could be sealed against the bulkhead. They would then vent the boot space but nothing else.
The job was complicated by the diagonal of the rollcage. But those years of yoga class, and the decision to make it in two parts, definitely paid off. It also helped that I started with card templates cut from an artist's mounting board rather than trying to use cereal boxes or the metal itself.
Fortunately Gilbern had bonded in a lip underneath the back window that the parcelshelf rests on, and the seat-back panelling has a square roll over the chassis tubes that becomes the back of the boot. A strut is riveted onto the seat back and to the lip under the rear window to provide some rigidity. So I had good surfaces on which to mount the bulkhead, but they were a little ripply and I had to avoid putting the join of the bulkhead above the tubular tie.
After trial fitting, I found another complication was that the bulkhead bisected the 'airflow' vents unique to this car. I intended to keep them but decided to blank off the upper portion so they could be sealed against the bulkhead. They would then vent the boot space but nothing else.

With a cheap bead-roller I flanged the two parts of the otherwise flat bulkhead, and rolled in some beads to strengthen the panel and stop it shaking around too much - my wife gets all the credit for turning the handle while I 'steered' the panels. Then drilled for the necessary rivets along the joining seam. I could then manouevre the two pieces into place behind the rollcage and pop-rivet them together before bedding the complete panel on a bed of silicon on the pre-existing lip. Finally, pop-riveting it along the length of the seat-back.
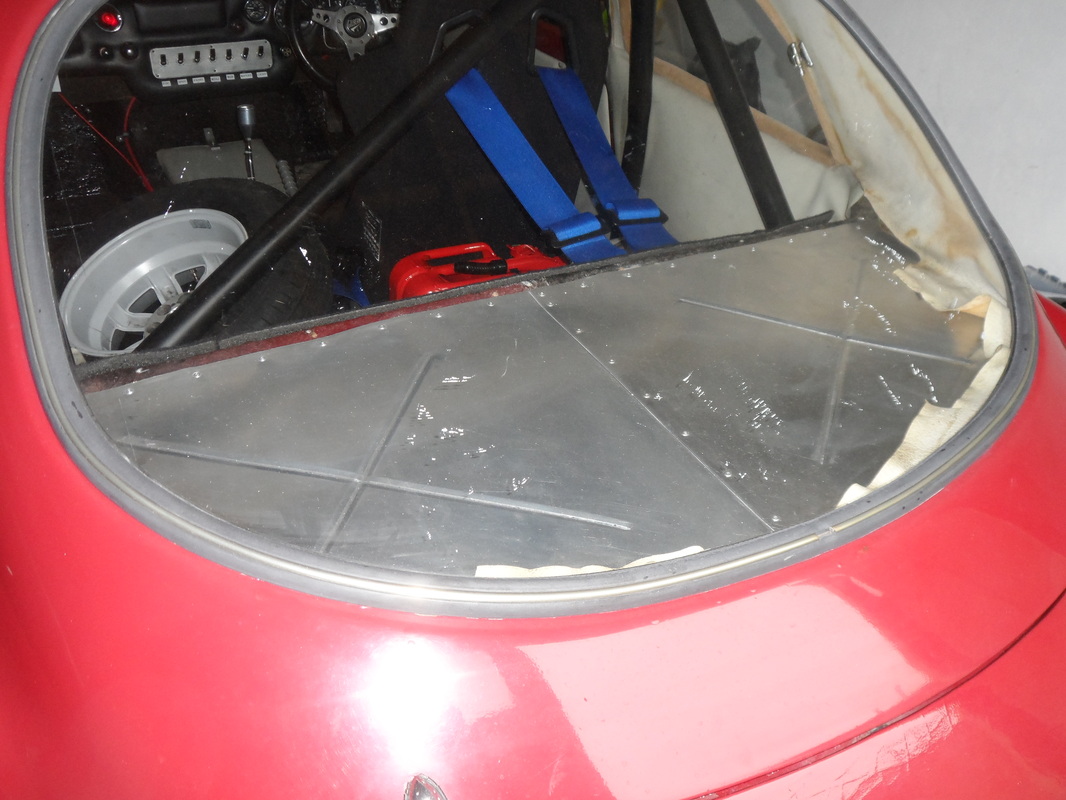
The marks you can see that seem to be on the finished job are actually glue on the inside of the window from the duct tape I used to hold the headliner out of the way while bedding the thing down. Need to clean them off with prep-prep!
Got it finished Friday night @ 1740. Bo'ness tomorrow and just in time tonight to go pick up one of my sons from school in 20 minutes....
Got it finished Friday night @ 1740. Bo'ness tomorrow and just in time tonight to go pick up one of my sons from school in 20 minutes....
 RSS Feed